need some ideas on how to change model and the image
Moderator: Cheaters
-
rpichay
- Newcomer
- Posts: 11
- Joined: May 15th, 2008, 7:54 am
need some ideas on how to change model and the image
anyone have ideas on how to make your own modeled hero and what program to use?? i gained this idea when i played dragonball map its pretty cool that they added the model goku and other stuffs there... and how can u change the icon image of the hero and its icon?? thx in advance
-
lilmanbryan
- Member
- Posts: 52
- Joined: January 10th, 2008, 6:29 am
- Title: Learning to Model
- Location: Shoreline, Wa
Re: need some ideas on how to change model and the image
OK here it goes...
Well if you want to make models, a really easy but limited way would be to use Warcraft3ModelEditor.
It allows you to take an existing model and re-arange the vertices, to shape it to make it look like something else (ex:goku). It also alows you to apply different skins and textures to the model to make the model have the same clothes/bodycolor/haircolor (ex:goku).
Right now I'm learning to model, and I am currently using a 3d modeling program thats free called "Blender", which you can find at http://www.blender.org/ and there, they also have great tutorials, and you can find lots of good ones on youtube. Haha.
Now it takes a pretty long time to acctually learn to and comlete a decent model with decent animations and decent skins, so you have got to be patient if you want to learn, because it can get really frusterating at some points, but don't give up because the rewards are great.
Now if you have any other questions on modeling you can ask me, and mabye we can be partners, cause were both noobins at modeling, lol =b.
Now onto making icons, which is pretty easy if you have the right tools and resources.
What you need is:
Photoshop/Infranview
Warcraft3ImageViewer2
The Image you want.
P.S.
You need an account to download the free trial of photoshop. you can use mine. it is: Username: [email protected]
Password: jellyisgood
lol
Now here's what to do once you have all of the above.
For this tutorial I will be using photoshop, but if your using infranview than you should be able to relate this tutorial to it...
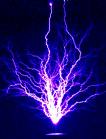
Step 1, Getting the image:
First off, get your image that you want to make into an icon. It's demensions should not be like a long rectangle, but more of a square shape, if you want to make it look good. For this tutorial I will be using this Kamehameha image.

Step 2, Resizing the image:
Now that you have your image, you want to resize it.
So open up photoshop and then when you're in photoshop, open up your image.
Now you want to resize your image.
Go to the tool bar where it says File, Tools, Help, Image, etc.
Now click on image.
Now click image size.
Now you want to deselect the box that says "Constrain Portions", and then type in, in the pixels boxes, "64" and in the second one "64".
Now click OK.
Your image should shrink or enlarge to 64x64.
Step 3, Adding the alpha channel:
Now that you have your image resized, you want to add an extra alpha channel.
So go to the right hand side, and you should see your image, the colors, and then the layers/channels/paths.
Go into the channels tab.
Now at the very bottom right, you should see a tiny trash can.
Click on the button next to that, which if you scroll over it, it should say create a new channel.
Now the image should turn white, because it created an alpha channel.
Step 4, Saving your image:
Now you have everything done, you want to save your image.
So now go into file, Save as.
Now go into the list of types, and click on Targa.
Make sure Alpha channels is checked, and name the file,
BTNKamehamehaIcon
Make sure you have in caps, BTN at the beggining or it won't work.
Now click save.
It should prompt you for the quality, make SURE that you press 32bits/pixels.
Step 5, Converting your image to .blp to save space.
Now you are able to use your icon in your map, but it will take up more space in your map, EX: .btn = 5kb, .tga = 16kb.
If you don't care then you can just use your Targa (.tga) image.
If you do care, then read this step.
So now you have your Targa image, open up your Warcraft3ImageViewer2.
Now click Open, or press Ctrl+O.
Find where you saved your Targa image and open it.
Now click Save, or Press Ctrl+S.
Now name it
BTNKamehamehaIcon.blp
Make sure you have .blp!
Now click save.
It should prompt you for the quality.
I Usually choose 80 without losing much quality. Remember Less quality = less space.
Now you have your Icon, ready for importing into your map!!!
------------------------------------------------------------------------------------
I will now tell you how to import it into your map...
Step 1, Importing your Icon:
First open your map.
Now Go to the Import Manager.
Now click Import File.
Find your .blp image and import it.
Step 2, Renaming the import path:
Now that you have imported your image you want to rename them import path
So double click on the imported file, and check the box that says Use Custom Path.
Right now it should say:
war3mapImported\BTNKamehamehaIcon.blp
We are going to delete the "war3mapImported\" on your image, and replace it with:
ReplaceableTextures\CommandButtons\
on your path, it should look like this...
ReplaceableTextures\CommandButtons\BTNKamehamehaIcon.blp
Now Save your MAP!!!
Now It's ready to use.
Step 3, Using your ICON!
Now your Icon is all Ready to use, so go to your custom unit, and at the top double click on the value that says Art - Icon - Game Interface
and go to Import.
Now scroll down until you find your icon, then click on it.
And there you go, you have your Icon!!!
Well I hope you liked my tutorial, I spent about 2 hours on it, haha.
And also remember when I asked if you wanted to be partners in modeling?
Well I was serious
P.S.
You need an account to download the free trial of photoshop. you can use mine. it is: Username: [email protected]
Password: jellyisgood
lol
Well if you want to make models, a really easy but limited way would be to use Warcraft3ModelEditor.
It allows you to take an existing model and re-arange the vertices, to shape it to make it look like something else (ex:goku). It also alows you to apply different skins and textures to the model to make the model have the same clothes/bodycolor/haircolor (ex:goku).
Right now I'm learning to model, and I am currently using a 3d modeling program thats free called "Blender", which you can find at http://www.blender.org/ and there, they also have great tutorials, and you can find lots of good ones on youtube. Haha.
Now it takes a pretty long time to acctually learn to and comlete a decent model with decent animations and decent skins, so you have got to be patient if you want to learn, because it can get really frusterating at some points, but don't give up because the rewards are great.
Now if you have any other questions on modeling you can ask me, and mabye we can be partners, cause were both noobins at modeling, lol =b.
Now onto making icons, which is pretty easy if you have the right tools and resources.
What you need is:
Photoshop/Infranview
Warcraft3ImageViewer2
The Image you want.
P.S.
You need an account to download the free trial of photoshop. you can use mine. it is: Username: [email protected]
Password: jellyisgood
lol
Now here's what to do once you have all of the above.
For this tutorial I will be using photoshop, but if your using infranview than you should be able to relate this tutorial to it...
Step 1, Getting the image:
First off, get your image that you want to make into an icon. It's demensions should not be like a long rectangle, but more of a square shape, if you want to make it look good. For this tutorial I will be using this Kamehameha image.
Step 2, Resizing the image:
Now that you have your image, you want to resize it.
So open up photoshop and then when you're in photoshop, open up your image.
Now you want to resize your image.
Go to the tool bar where it says File, Tools, Help, Image, etc.
Now click on image.
Now click image size.
Now you want to deselect the box that says "Constrain Portions", and then type in, in the pixels boxes, "64" and in the second one "64".
Now click OK.
Your image should shrink or enlarge to 64x64.
Step 3, Adding the alpha channel:
Now that you have your image resized, you want to add an extra alpha channel.
So go to the right hand side, and you should see your image, the colors, and then the layers/channels/paths.
Go into the channels tab.
Now at the very bottom right, you should see a tiny trash can.
Click on the button next to that, which if you scroll over it, it should say create a new channel.
Now the image should turn white, because it created an alpha channel.
Step 4, Saving your image:
Now you have everything done, you want to save your image.
So now go into file, Save as.
Now go into the list of types, and click on Targa.
Make sure Alpha channels is checked, and name the file,
BTNKamehamehaIcon
Make sure you have in caps, BTN at the beggining or it won't work.
Now click save.
It should prompt you for the quality, make SURE that you press 32bits/pixels.
Step 5, Converting your image to .blp to save space.
Now you are able to use your icon in your map, but it will take up more space in your map, EX: .btn = 5kb, .tga = 16kb.
If you don't care then you can just use your Targa (.tga) image.
If you do care, then read this step.
So now you have your Targa image, open up your Warcraft3ImageViewer2.
Now click Open, or press Ctrl+O.
Find where you saved your Targa image and open it.
Now click Save, or Press Ctrl+S.
Now name it
BTNKamehamehaIcon.blp
Make sure you have .blp!
Now click save.
It should prompt you for the quality.
I Usually choose 80 without losing much quality. Remember Less quality = less space.
Now you have your Icon, ready for importing into your map!!!
------------------------------------------------------------------------------------
I will now tell you how to import it into your map...
Step 1, Importing your Icon:
First open your map.
Now Go to the Import Manager.
Now click Import File.
Find your .blp image and import it.
Step 2, Renaming the import path:
Now that you have imported your image you want to rename them import path
So double click on the imported file, and check the box that says Use Custom Path.
Right now it should say:
war3mapImported\BTNKamehamehaIcon.blp
We are going to delete the "war3mapImported\" on your image, and replace it with:
ReplaceableTextures\CommandButtons\
on your path, it should look like this...
ReplaceableTextures\CommandButtons\BTNKamehamehaIcon.blp
Now Save your MAP!!!
Now It's ready to use.
Step 3, Using your ICON!
Now your Icon is all Ready to use, so go to your custom unit, and at the top double click on the value that says Art - Icon - Game Interface
and go to Import.
Now scroll down until you find your icon, then click on it.
And there you go, you have your Icon!!!
Well I hope you liked my tutorial, I spent about 2 hours on it, haha.
And also remember when I asked if you wanted to be partners in modeling?
Well I was serious
P.S.
You need an account to download the free trial of photoshop. you can use mine. it is: Username: [email protected]
Password: jellyisgood
lol
[blinking]lilmanbryan[/blinking] appreciates you reading this...
[blinking]Look Down...[/blinking]
[blinking]Look Up...[/blinking]
[blinking]Look Down...[/blinking]
Spoiler:
[blinking]Look Up...[/blinking]